
Growing Your Own Sprouts
First you need a sprouter. We use the EasySprout™ and SproutMaster™ sprouters. The best seed for growing sprouts is organically grown. Look for seed specifically grown for sprouting. Start with something simple. I would say alfalfa is your safest bet. It is easy to grow, cheap, easy to find and tastes great. Sprouting is really simple though so start with whatever you feel like trying: lentils, clover, broccoli... start with the salad types. Avoid things like shelled sunflower seeds and mucilaginous seed such as arugula and mustard. They are better suited for growing as a microgreen.
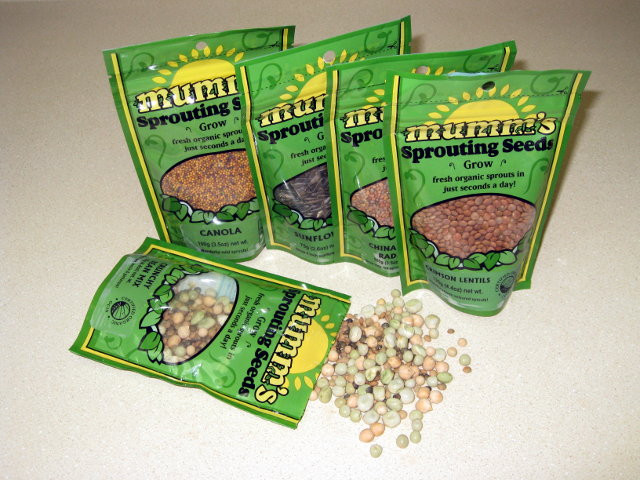
Find a good source of organic seeds sold specifically for sprouting.
Initially seeds need to be soaked in water for 3 to 12 hours. It depends on the seed. Just add your seed to a container and pour in some water. The seeds will swell so be sure to use a good amount of water. This initial soak is what gets the entire process started. This is what breaks down the enzyme inhibitors that prevented the seed from sprouting in the first place. Don't start with too large an amount of seed. A few tablespoons of alfalfa doesn't look like much when just seed, but once sprouted the volume increases greatly. You want to eat them while they're fresh so sprout often with small quantities instead of lots all at once.
Once soaked, the seeds will have to be drained thoroughly. If they are left in too much water they will rot. This is where your sprouter does it's job. Some of the simplest sprouters around are simply jars with a piece of mesh secured over the opening with a rubber band. When tilted upside down or on an incline, water is free to drain out of the jar. More elaborate sprouters will also provide air circulation to keep the sprouting seeds "less moist". The added air flow also helps regulate temperature as the sprouting process generates heat and too much heat it not good. Although you don't want your sprouts to be too cold either. The optimal temperature is somewhere just below room temperature. In your kitchen out of directly sunlight is likely good enough.
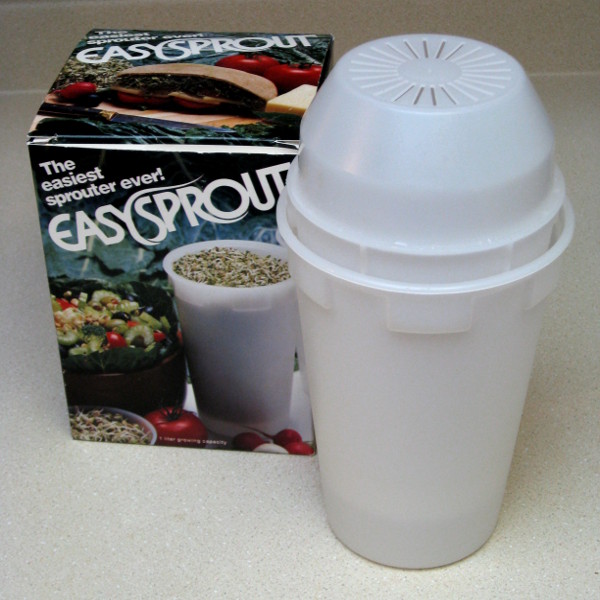
We've been using an EasySprout™ sprouter for some time now. The instructions that come with it are terrible but it's pretty straight forward to use so I forgive it.
At least once a day, more if your kitchen is warmer, you need to rinse your sprouts. Rinsing helps wash away any contaminants that may be forming on the sprouting seeds but it serves several other purposes also. It regulates the temperature of the sprouts and also helps break them up to avoid clumping. This also frees some of the hulls that might be clinging to the emerging sprout. Your sprouts should be rinsed in luke-warm water - something close to the temperature at which they are sprouting. I like to use the sprayer on my kitchen faucet as this really gets them stirred up. Don't be afraid to give them a good shake while rinsing to loosen the sprouts from one another.
Some elaborate sprouters will spray water on your sprouts for you as they grow. It sounds like a good idea but I'm not convinced it's worth the expense. These sorts of sprouters recycle the water in their reservoir and essentially mist it over your sprouts, over and over. It is a low pressure mist so all it's really doing it keeping you sprouts moist. It's not keeping them loose and not keeping them clean. These sprouters, I believe, are more suited for the growing of microgreens: sprouts with green leaves. But I have yet to use one so I can't really say for sure. When your sprouts are growing they need to be kept from drying out but this is not to say they need to be soaking wet.
Most seeds will be ready to eat in 3 or 4 days although different sprouts may taste better eaten earlier than others. Some people prefer to let the sprouts form green leaves whereas others prefer to eat their sprouts just as the seeds are swelling and starting to sprout. When they have reached the size you desire, store them in the fridge to slow their growth. Don't keep them for more than a few days as they start to break down and go bad quickly. You want to eat them while they're fresh anyways. I like to dip into mine and just eat them by the handful while I'm standing in front of the fridge. Fresh sprouts don't last long around here.
It is important to keep your sprouting equipment as clean as possible. If you leave sprouts in your sprouter too long they start to turn brown, and this will stain the sprouter, particularly those made of a white plastic. Some sprouting instructions I've read recommend the use of bleach or peroxide to thoroughly disinfect the sprouter before use. If I had to do that everytime I used the thing, I'd stop using it. I find lots of hot soapy water is fine and when I'm feeling particularly paranoid, an over night soak in a diluted solution of hot water and vinegar puts my mind at ease. Just remember to keep it clean.


