
SproutMaster™ Instructions
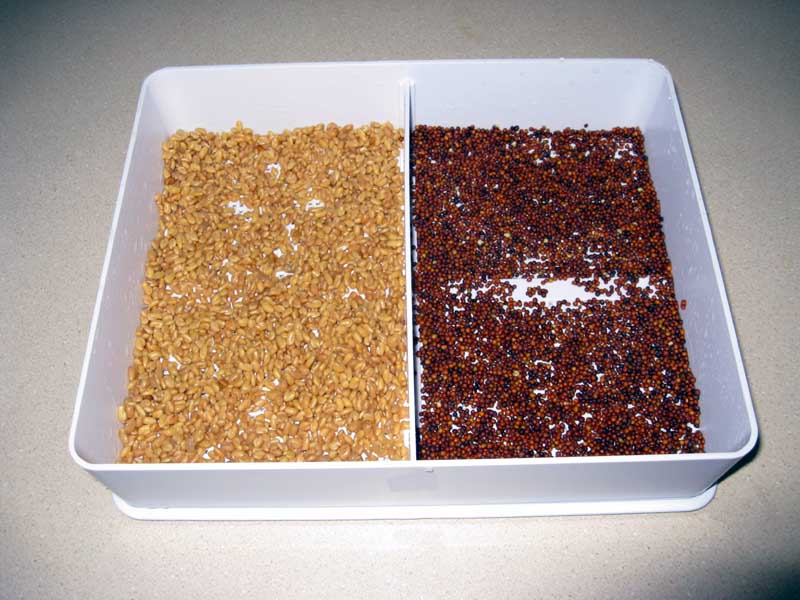
Soak Your Seeds
You cannot soak seeds in the SproutMaster™ unless you use a larger tray to hold the entire sprouter while the seeds soak in it.
Start by soaking your seeds for anywhere from 2 to 12 hours depending on the seed you wish to sprout. You can not soak seeds directly in the SproutMaster™ unless you have another tray that can hold the sprouter and all the water for soaking. But that's ok. Just soak your seeds in another containers. Pictured here are Fenugreek and Broccoli seeds soaking. The Fenugreek was soaking for eight hours and the Broccoli for three.
Ready for the Sprouter
Three tablespoons on each side of the sprouter provides a good yield.
After soaking, spread the seeds out in the SproutMaster™. In this case I have used the divider in my 8x10 inch sprouter and put the Fenugreek on one side and the Broccoli on the other. The SproutMaster™ comes with a pair of lids: one you can use inverted as a drip tray under the sprouts and the other to cover the tray.
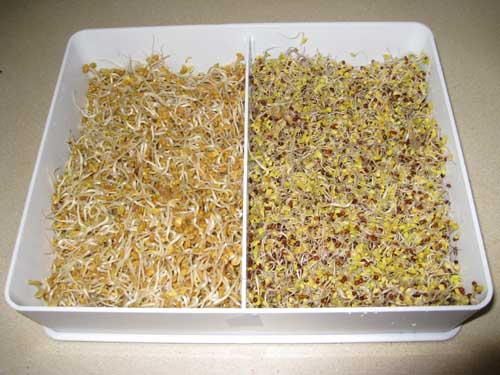
The Next Day...

The seeds are starting to sprout.
After one day you will start to see results. I rinse my sprouts twice a day so by this time I have already rinsed at least once. I also like to sample my sprouts before each rinsing to see how they taste.
Rinsing
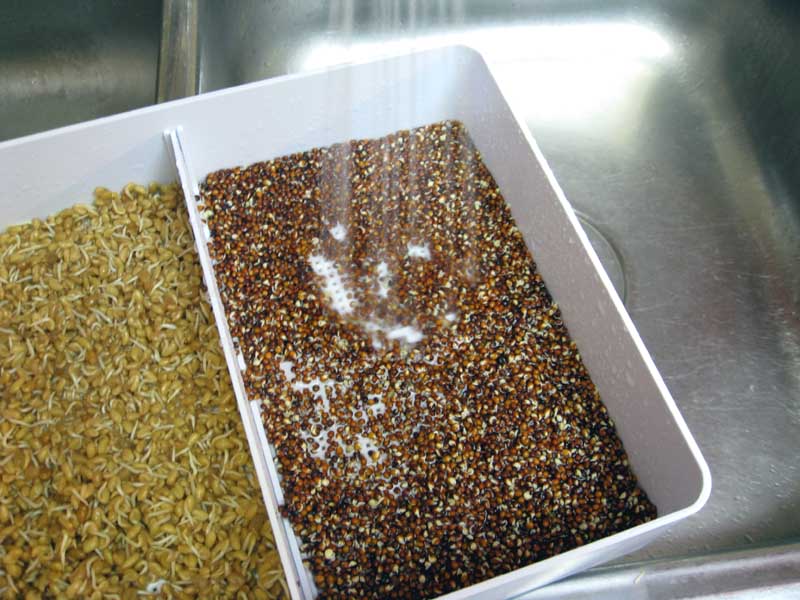
The sprayer does a great job for rinsing sprouts because you can control the water pressure and it can provide a good strong spray for breaking up clumps of sprouts.
Rinsing sprouts in the SproutMaster™ is very simple. Just run water through it. But I find with small seeds and the divider in place several seeds will find their way into the channels for holding the divider and this will keep it 'up' for seeds to flow beneath. The kitchen sink sprayer is the best thing to use for rinsing sprouts. Especially when you want to direct a powerful spray at a clump of sprouts that needs to be broken up.
Draining

It is easy and absolutely necessary to drain your sprouts in the SproutMaster™ after rinsing.
It is important to drain off as much water as you can after rinsing. This is easy to accomplish in the SproutMaster™. Just tilt it towards one corner and the water will collect there and drain off. It only takes a minute or two. When you place the tray back on the cover that is acting as a drip tray, you should see no water dripping out of the tray. Excess water in your sprouts can quickly lead to mold and rotting.
The Second Day...

After two days the sprouts are very much edible. Some people like to stop even at this early stage.
By the second day your seeds are starting to look like... sprouts. Some people stop here. At this point I'm routinely dipping into my crop for a taste even though I like to wait another day before stopping and storing.
The Final Day
At the third day the sprouts are pretty much where I want them.
By the end of the third day my sprouts are pretty much where I want them. I find with salad types in the SproutMaster™ at this point many roots are starting to get tangled in the holes at the bottom of the tray. If I let my sprouts stay in the sprouter for too much longer they will start to turn brown.
Going Green

With plastic wrap over the SproutMaster™, another twelve hours with exposure to ambient light provides just enough green to make them look nice.
To help with dehulling you can expose your sprouts to light so the leaves will open and pop a few of the hulls off. But I really do this only for the colour. I don't need much green. Just enough to make it interesting. I remove the top lid and wrap the top of the sprouter tray with plastic wrap and let it sit on the kitchen counter for another 12 hours. I doesn't need to be in direct sunlight. The indirect lighting the sprouts receive on the counter is more than enough.
Dehulling

Removing the hulls from small sprouts like Broccoli is simple and necessary prior to storage.
Removing hulls is always a good idea. It is easier to do for some types of sprouts than others. Broccoli hulls are very easy to remove. By soaking the sprouts in a bowl of water, the loose hulls tend to float to the top and collect where they can easily be scooped out. Some will remain at the bottom of the bowl as well as any seeds that didn't sprout. Since the hulls retain moisture, you should try to remove as many as possible if you plan to store your sprouts in the refrigerator.
Remove as much moisture as possible

You need to remove as much water as possible before storage and a salad spinner works wonderfully.
Sprouts need to be dry for storage. Too much moisture and they will start to rot. I have found one of the best ways to remove moisture is with a salad spinner. A small spinner like the kind used for herbs is perfect. You would think the smaller sprouts would slip right through the holes in the spinner basket but they don't. Some of the hulls on the smaller sprouts do get through the basket though which is an added bonus of spinning.
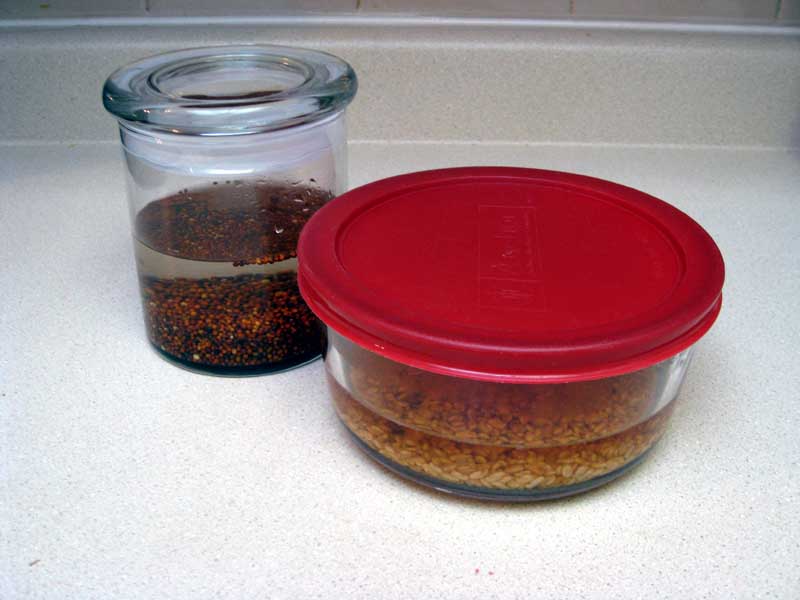
Storage

With all excess moisture removed, sprouts store nicely in a sealed container for a few days in the fridge.
I like to store my sprouts in the fridge in a sealed container. If you use a container with a ventilated lid they will dry out faster but may be less susceptible to spoiling. I have heard you can keep sprouts this way for up to a week but I never keep mine for more than a few days. They start to wither and loose taste. Besides, they're best eaten when fresh.


